Making a new email on Constant Contact
Purpose:
To learn how to edit and schedule weekly emails on Constant Contact (using existing emails as a template).
Steps:
1. Log in to Constant Contact
2. Enter the username and password (See Jonathan for these)
3. In the Recent Campaigns Screen, find a recent LBE Weekly Email
4. Click the More drop-down and select Copy.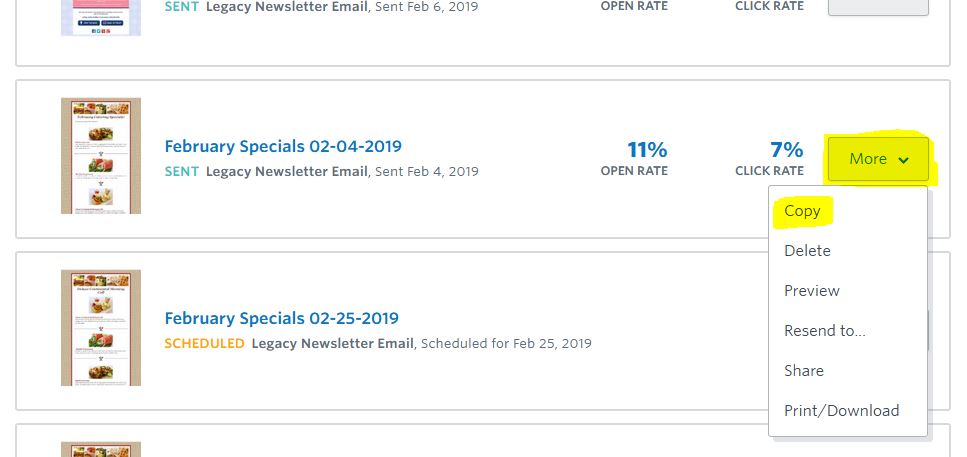
5. In the Customize Your Campaign screen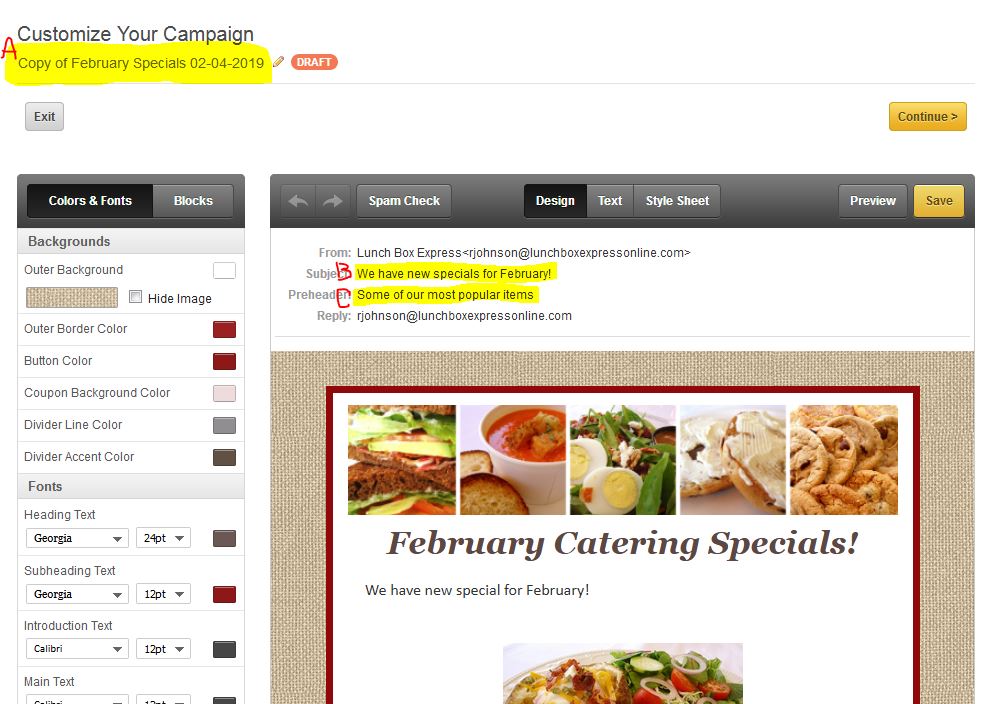
a. Change the name of the email following this format “<Description of email> <Schedule date>”
b. Change the subject of the email.
c. Change the pre-header of the email.
6. The email is comprised of BLOCKS. If you mouse-over any block, you can click it to edit it.
7. Edit the HEADING block text
8. Edit the INTRODUCTION block text
Edit a Content Block
9. Click a content block to enter the edit mode.
10. To change the image, mouse-over the image and click the gear icon on the top-right. Click CHANGE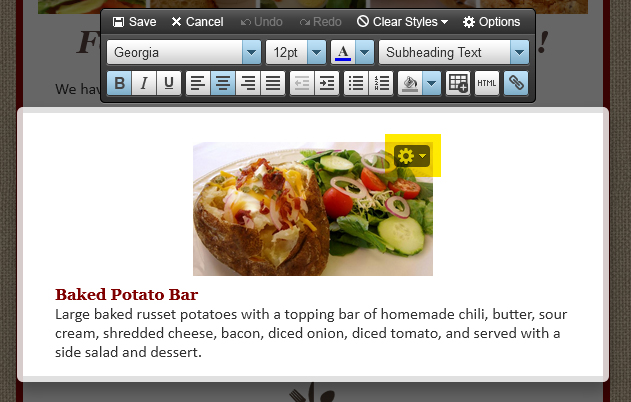
11. Use the search field to find a picture of the new item.
12. Click the picture of the new item.
13. We want to make all images clickable links. To do that:
a. in a different browser tab, navigate to the webpage of the special.
b. Copy the URL address of the special’s page.
c. Paste the address into the field under “Make a clickable link:“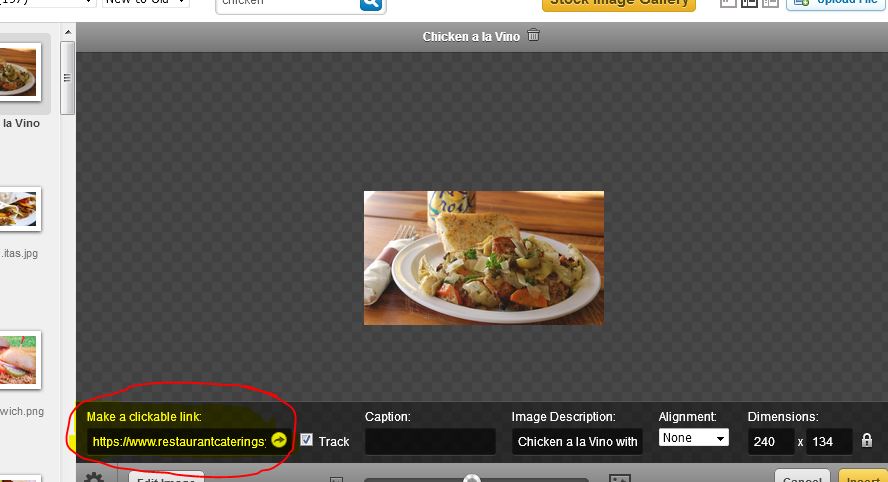
d. When done, press the INSERT button on the bottom-right of the window.
14. We also want to make the title of the menu item a link.
a. Change the text of the menu item to the new menu item.
b. Highlight the whole menu item name (it’s bold and red)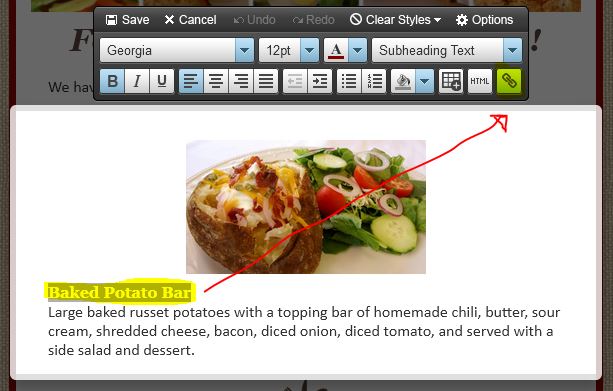
c. In the formatting options at the top of the block, click the little chain icon
d. In the field for “Link URL:“, paste the copied URL address of the special’s webpage.
e. Press the INSERT button to insert/change the link.
15. Edit the menu item description to the new menu item description. You can copy and paste this text from the same webpage.
16. Press the SAVE button at the top when you’re done editing the Content Block.
17. Repeat steps 9-16 for the other content blocks.
18. When your email is ready, scroll to the top and press the CONTINUE button on the top-right.
Scheduling the Email
19. Click the + button to the right of the “Add to Email List” field.
20. Click the appropriate Lists for your email. For weekly LBE emails, you should click “Catering Customers” and “LBE Employees”. Click SAVE.
21. Click “Schedule for Later” in the “When to Send” section on the right.
22. Choose the date and time to send. LBE emails typically send on Mondays at 10:05 AM
23. When everything is set, click the SCHEDULE button at the top right of the screen to schedule your email.